I thought that this year I would get the tutorial on how to construct this year's ornament shape up at about the same time as the first pattern so that you can see what's possible and decide how you want your ornament to be. I'll show you how I made mine and what else you might be able to do with yours.
First of all you will need to stitch your parts - you want the stitching itself to be at least 10 stitches apart before you make the backstitched outlines.
Just before you separate the parts make sure you mark the top in some form - Aida especially isn't really all that square so knowing which way was up means you can have the top facing the same direction when you assemble things and the end result will be more pleasing to the eye and be more "square"
Next make your cord (see the
tutorial and picture below) and tassel (see the
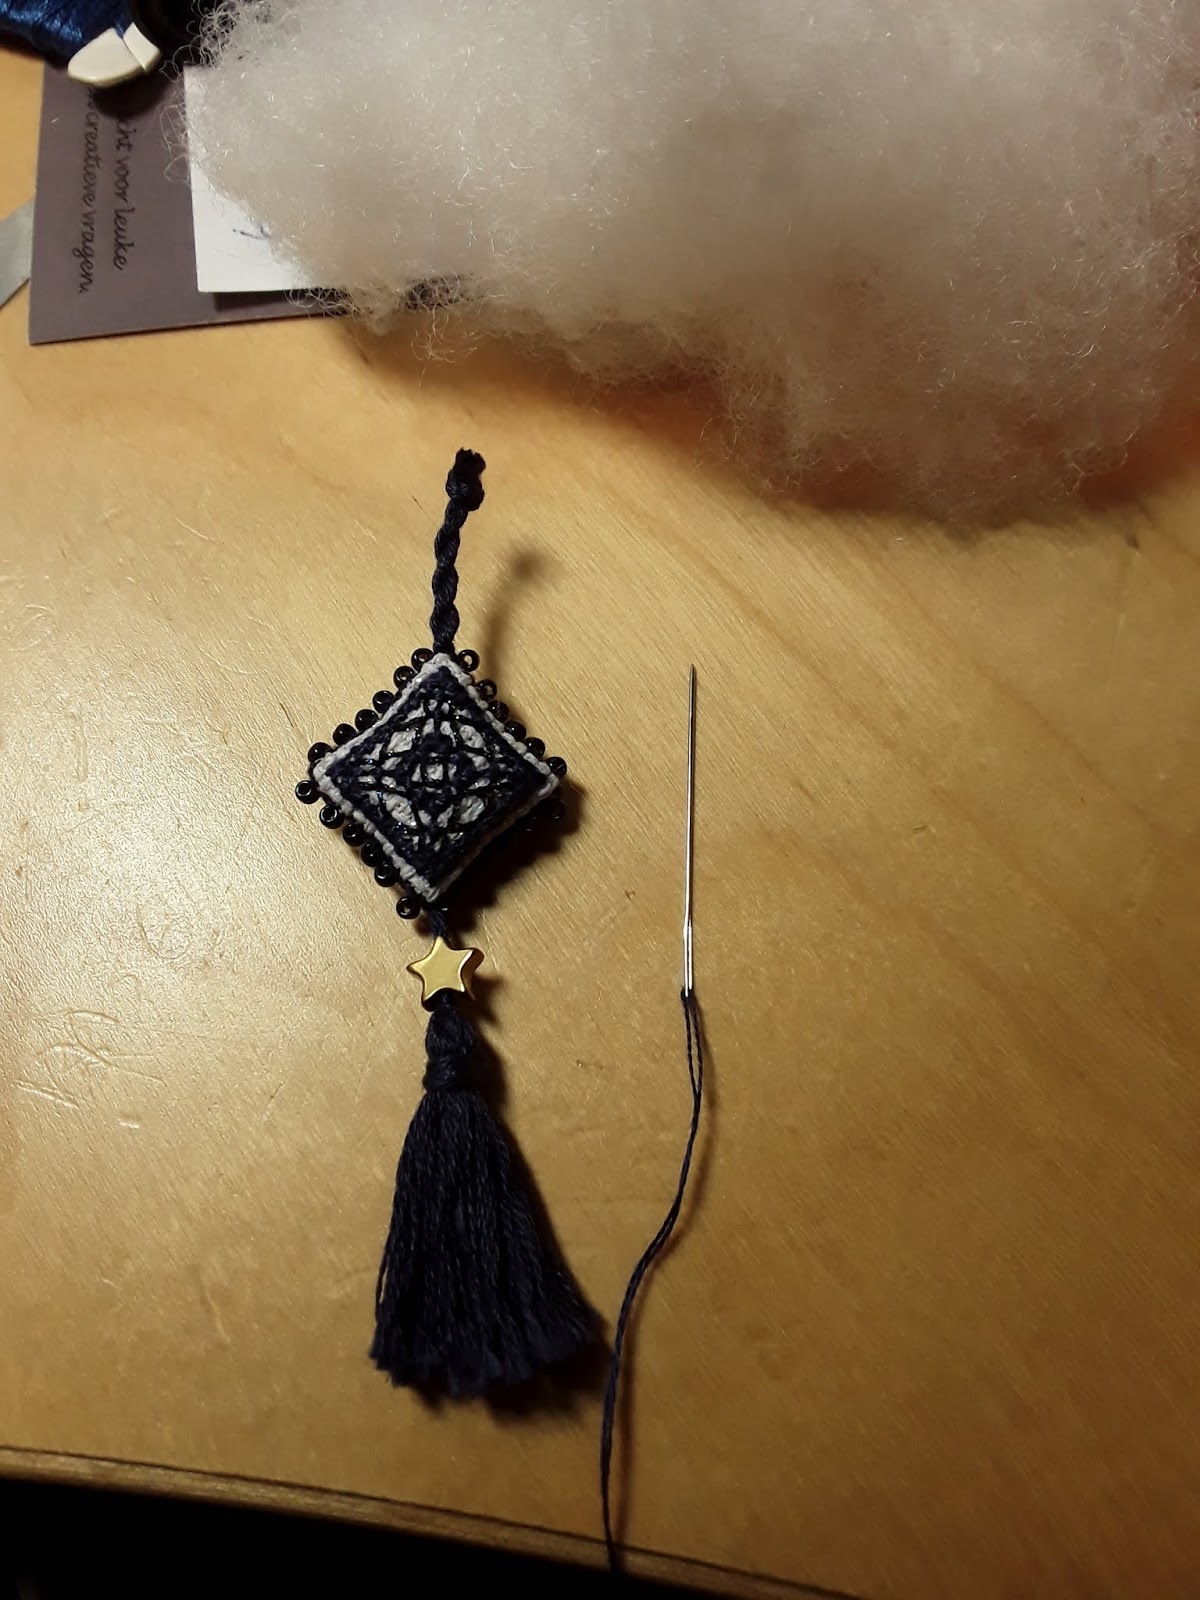
tutorial), and gather the rest of the things you need or want to use to assemble your ornament. Here you can see a little metal star bead, some mini bells and seed beads (all optional) as well as the cord, tassel and stitched parts of the ornament (definitely need these) If you want to stuff the ornament parts you will need something to stuff it with.
I used about 60" (approximately 150cm) to make the cord, then I made a knot 6" (15.25cm) along from the first knot used to stop the cord from untwisting, one
about 1/4" (6mm) away from that knot. Then measure 1/2" (1.25 cm) and tie a knot
there. If the knots aren't *exactly* at those points don't worry, just
make it more or less in that spot. There was quite a bit left so I may make it a bit shorter next time.
Next you need to decide which bit to have on top - do you want the smaller part on top or the bigger part? Or do you prefer them separate? You need to decide now because that determines which part has to have the hanging loop added. I decided to do the smaller bit on the bottom as that gives me more space to put the hanging loop.
Start by making the lower part of the ornament first - remember to add the tassel and the tiny cord bit opposite each other as you make it. I added the star bead to the tassel before using it to add a little sparkle at the bottom. As it didn't fit over both threads used to hang it from I threaded one of the ends back down into the main tassel bit using my trusty mega needle and then threaded the bead onto the remaining thread.
Next fold over the seam allowance and press in place with your fingers - I use these clips to keep the corners folded till I'm ready to stitch - on these tiny bits they do look like overkill.
Next place them wrong sides together (pretty side out), making sure the dots you placed earlier are facing each other. I made this photo with the bigger bit as the tiny bit was too small to hold and photograph at the same time. Then remove both clips from a corner and align it properly before putting one clip back.
So you go from eight clips on two bits to four clips on a pair of bits. Then it's time to start whip stitching the two sides together using a single strand of thread. I like to start away from a corner so the knot doesn't make a bump in the corner. Bring the thread from the back to the front by sliding the needle between two backstitches.
I started four stitches from the corner on this one. All you need to do a whip stitch is slide the needle under the backstitches that are opposite each other - always work from right to left (as you can see in the picture) or left to right, which way is your personal preference, it doesn't matter as long as you are consistent. You will then get angled stitches and if you use beads they will be angled too. Make sure you don't go through the fabric as you do this.
If you prefer you can do a ladder stitch and you do that by going right to left, then left to right - alternating the two as you go along, you get a straight stitch across then, and the beads will be straight too. Since I frequently get distracted by kids etc. and have enough trouble remembering afterwards if it's a bead stitch or not, I don't also add the complication of remembering which direction I need to stitch - it's just safer for me. Do which suits you best, it's all ok.
Sometimes, especially at corners or after adding cords or tassels it's a bit difficult to get your needle under both backstitches at the same time - just do one at a time and take care to keep using the stitches that are opposite each other.
I added the mini cord at the first corner and will add the tassel on the third corner - the cord is less likely to get in my way and I tend to forget to add things if I try to wait till the second corner.
Just keep going round till you have all four corners done and then, if you choose you can stuff it with some filling - I did because I didn't want it flat. Then finish off stitching the side closed in exactly the same way as you did the other sides.
Tie a knot in the thread after sliding the needle under the first stitch you made - I usually do two or three knots just to be safe. Stab your needle between the layers and back out on the back of the ornament. Pull tight and cut the thread.
Your first bit of ornament will look like this - or bigger if you decided to do the big one at the bottom.
Now repeat the process with the other part but instead of adding the single bit of cord add the ends of the 6" cord two or three stitches from each side of what will become the top corner. Don't forget to add the ornament part you finished first opposite the cords corner and double check to make sure it's facing the correct way - it wouldn't look nice if the back was facing away from the front of the bigger part of the ornament.
Your ornament will now look something like this. You may notice that the bells I showed earlier are missing - that's because I forgot to add them and decided to leave it as is once it was finished.
Of course you could always choose to do just one of the ornament parts on it's own for a smaller/tiny ornament for a smaller tree - or even as earrings if it's the smaller one!
I hope this was clear enough for you - let me know if you have any questions - just ask in this post, it's easier.


Wow! Something new to try!! Thank you!!
ReplyDeleteYou are welcome! I hope it goes well!
DeleteWhat a great tutorial!
ReplyDeleteThank you! :)
DeleteGrazie!
ReplyDeleteYou are welcome! :)
DeleteWow, what a great blog you have... so much inspiration. I have put you on my list and surely will be back soon.
ReplyDeleteNana
Thank you! I look forwards to seeing you again :) (and I might even be faster with my answer!)
DeleteFantastic information. Thank you so much.
ReplyDeleteThank you I'm glad it's useful! You are very welcome :)
Delete