Tuesday 12 November 2013

Mini Pumpkin Box

This all started because I needed to test my arm and see what it could take - if I could embroider yet or if it hurt too much after my arm injury. I'd been joking around for a while that I'd make one of the cookies from the Cookie Clicker game I play.  The latest update of the game has Halloween themed cookies and one of them is a pumpkin. I decided to do that one as, if it worked out and I was able to finish it on time I could then also enter it for the Deviant Art Artisan Crafts gallery  Trick or Treat Contest for the fake pumpkin category.

I made this on a scrap of even weave that I had left over from the fruit sewing kit I'd made. It took quite a bit of effort to manage to do this as my arm and had really didn't like me doing this all that much but as it wasn't really painful I decided it would be ok to keep going as I'd been told that was ok as long as it didn't hurt.

The embroidery took me about 5 hours to do - about 4 times longer than I'm used to for such a small piece. Once it was done I needed to do something with it as a tiny embroidery all on it's own wasn't going to cut it. I remembered that I also had a couple of bits of thick cardboard from making the fruit sewing kit so i grabbed them and cut one strip into 2 squares of 2 1/2 inches and the other into 4 strips of 2 1/2 x 1 1/4. I dug around the bits of fabric I had handy and found a pumpkin fabric and a autumn leafy print.

I first sewed the pumpkin embroidery to the square that would make the lid then I fixed the outer fabric to the cardboard by doing a herring bone stitch to pull the edges around the card, next I folded over the seam allowance of the pumpkin fabric and sewed that down with smallish stitches. Once all the pieces were made I sewed them together with a whip stitch. I added a little orange leaf bead to the lid as a way to open and close it.

Stats:
Size of embroidery: 1 1/4"
Colours used: 7
Number of stitches: 239
Size box: 2 3/4" wide  x 2 3/4" deep x 1 1/2" high

Apple and apple/strawberry jam

This time of year when fresh apples are plentiful I like to make apple jam. It's not something people tend to make which is a shame as it is the yummiest jam ever, especially when it's made with strawberries too (though people who don't like strawberries would probably disagree on that point hehe). If you like apple sauce but want something a bit more grown up then apple jam is for you! It's also very easy to make and doesn't require any special equipment.

Equipment you need: 
  • Large pan (I used a 5 litre/10 pint pan but larger is probably safer)
  • Wooden spoon
  • Jam jars:  4 - 5 jars with a metal screw lid per kg/2 pounds of fruit
  • A slotted or perforated spoon if you have one - otherwise a normal spoon will do.
See - nothing really special needed :)

Ingredients for about 4 jars of jam*:
  •  1 kg / 2 pounds roughly grated apples** (on a 4 sided standing grater I used the largest one)
  • 1/2  kg / 1 pound of  granulated sugar
  • 1/2 kg / 1 pound of jam sugar
  • A pinch of cinnamon (optional)
  • A teaspoon of lemon juice (optional)
Instructions:
  1. Put the grated apple into the large pan with the cinnamon, lemon juice and add the granulated sugar only.
  2. Put it on a low heat and stir the apple and sugar together - it will be quite dry at first but s the sugar gets wet from the apple and starts melting it will soon become liquid.
  3. Bring it to the boil slowly, stirring all the time - by doing it slowly you give the apple some time to cook which results in a better flavour later on.
  4. Use the slotted/perforated spoon to remove any scum (white bubbly stuff) that floats on the top of the jam.
  5. Once it's getting close to the boil add the jam sugar.
  6. Stir it in carefully and keep stirring till the jam is boiling even when you stir.
  7. Take the spoon out and let the jam boil for 4 minutes exactly.
  8. Meanwhile wash the jam jars up in the hottest water possible - you need the jars hot when you pour the jam into the jars and carefully dry them on inside as water in the jam is a bad thing.
  9. Keep the jars warm in the oven on a low setting.
  10. When the time is up turn the heat off.
  11. Do the next bit as quickly as you can - you need to do this while the jam is still close to the boiling point.
  12. Get the jars out of the oven and place them on a tea towel to protect your work surface and avoid them shattering.
  13. Fill the jars almost to the top with the jam.
  14. Close the jars as tightly as you can with the lids and then turn the jars upside down.
  15. This will create the vacume seal jam always has.
  16. After 5 minutes turn the jam the right way round (don't leave it any longer or the jam will stick to the lid and not move down.)
  17. Leave to cool while still on the tea towel, add a lable with the type of jam and the date.
  18. The jam should be kept in a cool dark place when sealed and in the fridge when opened.
Enjoy!

  If you wish to make apple/strawberry jam just use half apple and half strawberry and don't use cinnamon.


* Please note that I'm using whole pounds even though a pound is less than half a kg as its easier to weigh and it doesn't make difference to the end result except there being slightly less jam. Just choose either pounds OR kg and stick with that and it will be fine.
** I used Elstar - a crisp semi sweet apple - I'd suggest using any apple you like to eat.


Monday 7 October 2013

TUSAL update

This time I'm giving you a 3-in-1 TUSAL update as it's been a while since I have taken photo's of my TUSAL jars and put them on my blog. What is a TUSAL? It's a Totally Useless Stitch-A-Long! Check the side bar for a linky to the lovely lady who runs it. Quite a lot has been created lately but not always stitching related and as I only keep the threads from embroideries the jars are not as full as they might be. I am only including photo's of the embroidery things I've worked on, however everything mentioned is on my blog.

July

 In July the only thing I embroidered was the raccoon embroidery so the jar is empty aside from the tails of threads and the threads from the kit that I didn't use as they were too short for me to keep.

August

In august I worked a bit on the apple and on the failed mystery project B

September

 
In September it got a lot done I finished the apple and stitched a complete sewing kit.
Non stitching wise I made an e-reader cover and a cable pouch for the e-reader cable. as well as completing a recycled plastic messenger bag, a crochet plastic basket and a tiny little pouch that is the right size for a few coins or 2 AA sized batteries and a small quilt top.

A little bit more fruit... or is it a lot?

As I said on my apple post:
This was made for the #stitchingpirates Sailing the fruit contest however as the rules say that there must be 2 pieces of fruit this is not my final entry - I need to add something else before it is eligible.
Well the pieces you see with the apple are the "something else" I added to make it an eligible entry. I first planned to do a 3D  strawberry which was originally mystery project B but it turned out to be too stiff to be able to make a strawberry out of it so I knew I had to make something a little bigger. So I then decided to make a tangerine to go with the apple but creating a pattern as I went along making the tangerine (as I just *knew* that people would want to make the tangerine and there was no way I'd be able to make a pattern once I'd completed the piece) was slow and I didn't think I'd be able to finish this on time. So I looked in my pattern scrapbooks to see what I could find that might work.

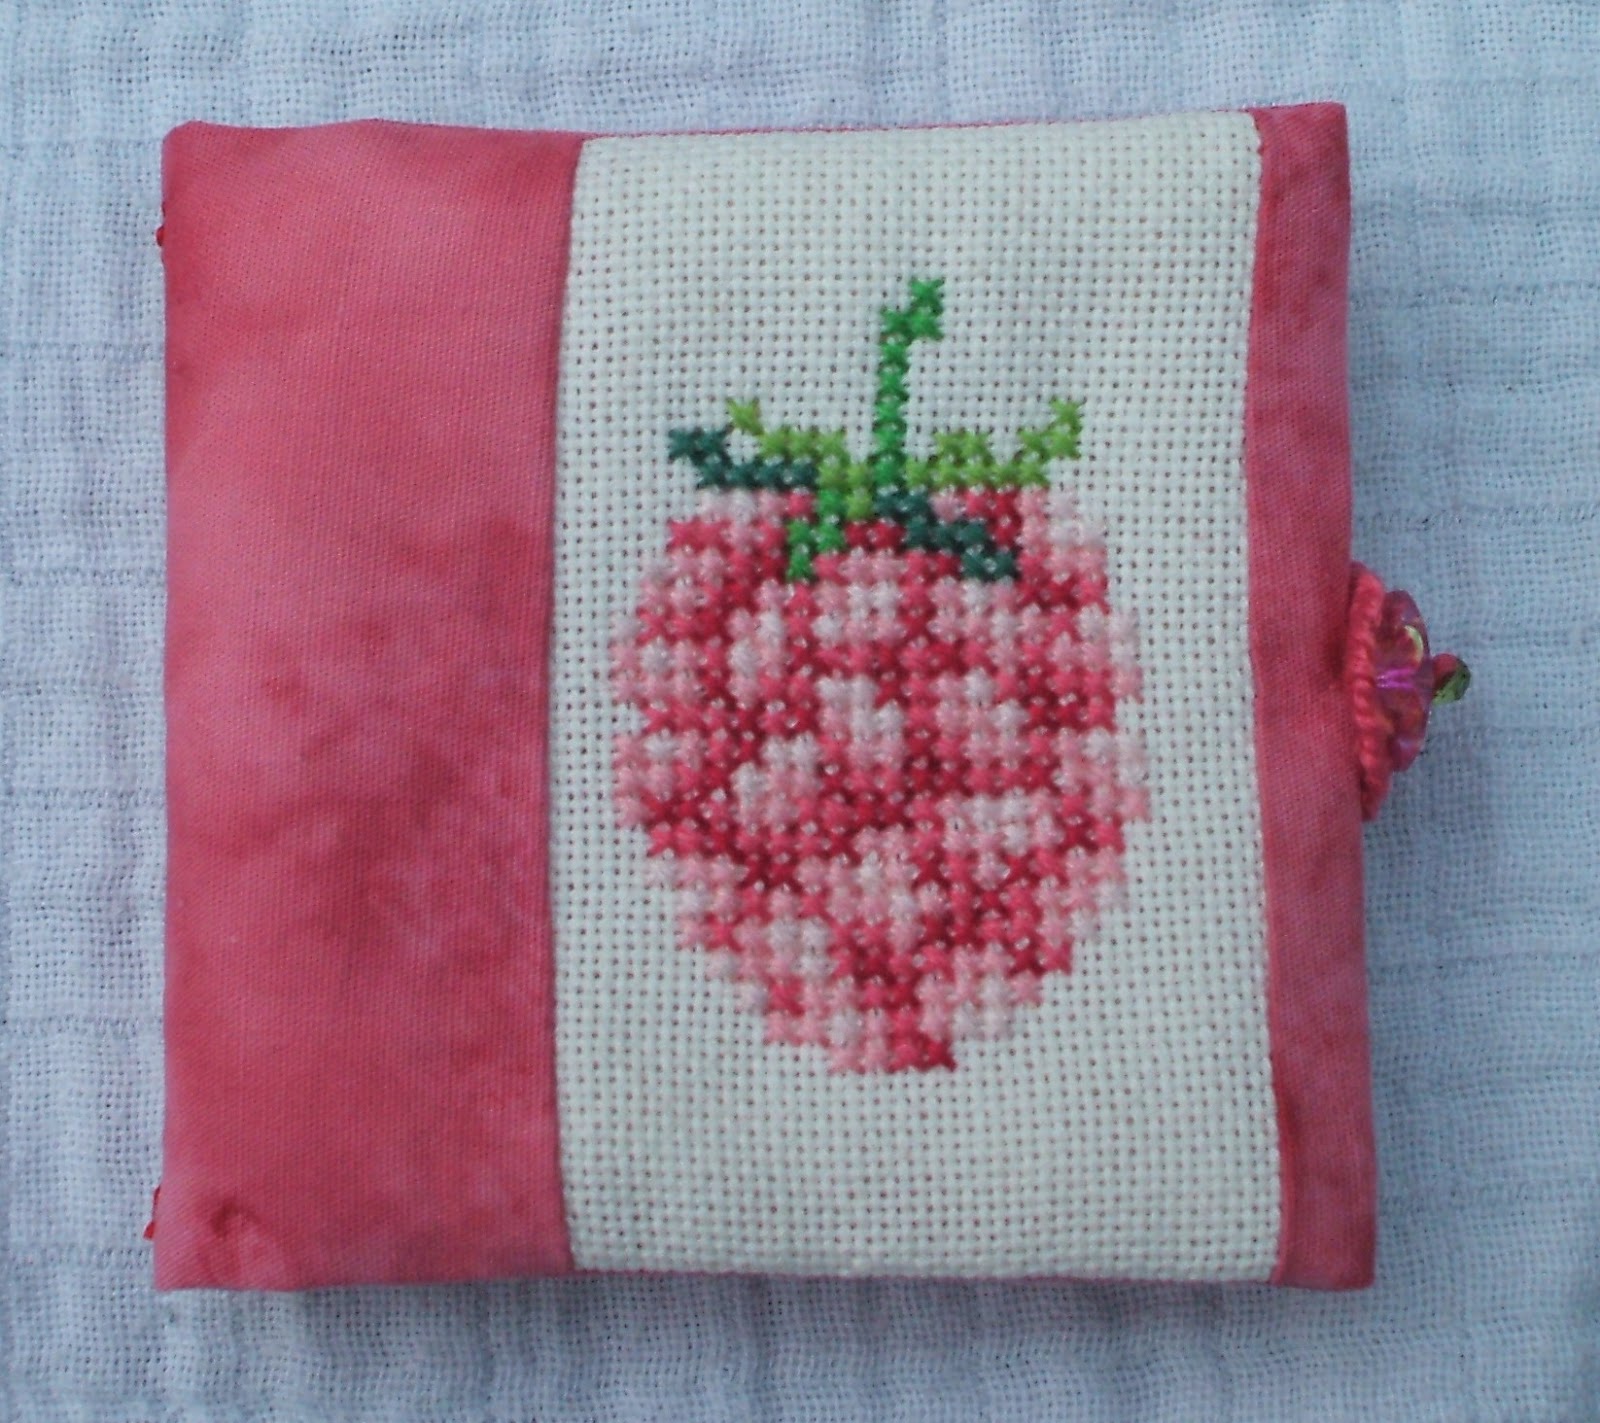
  It all started with the raspberry embroidery which I completed in less than a day but once it was done I didn't know what to do with it and it didn't really seem to suit the apple so I set it aside to think. The pattern I'd found in my scrapbook to make the raspberry also had some other fruit so I decided to move on to the strawberry with the initial plan of using the strawberry next to the cherry as a needle book but the strawberry turned out to be so bit that would have been a little bit too large for the needle book, and the two together would have been bigger than the bit of embroidery fabric I had left. At that point I decided to just do the strawberry and leave the cherry for something else, though I now also didn't know what to do with the strawberry either.
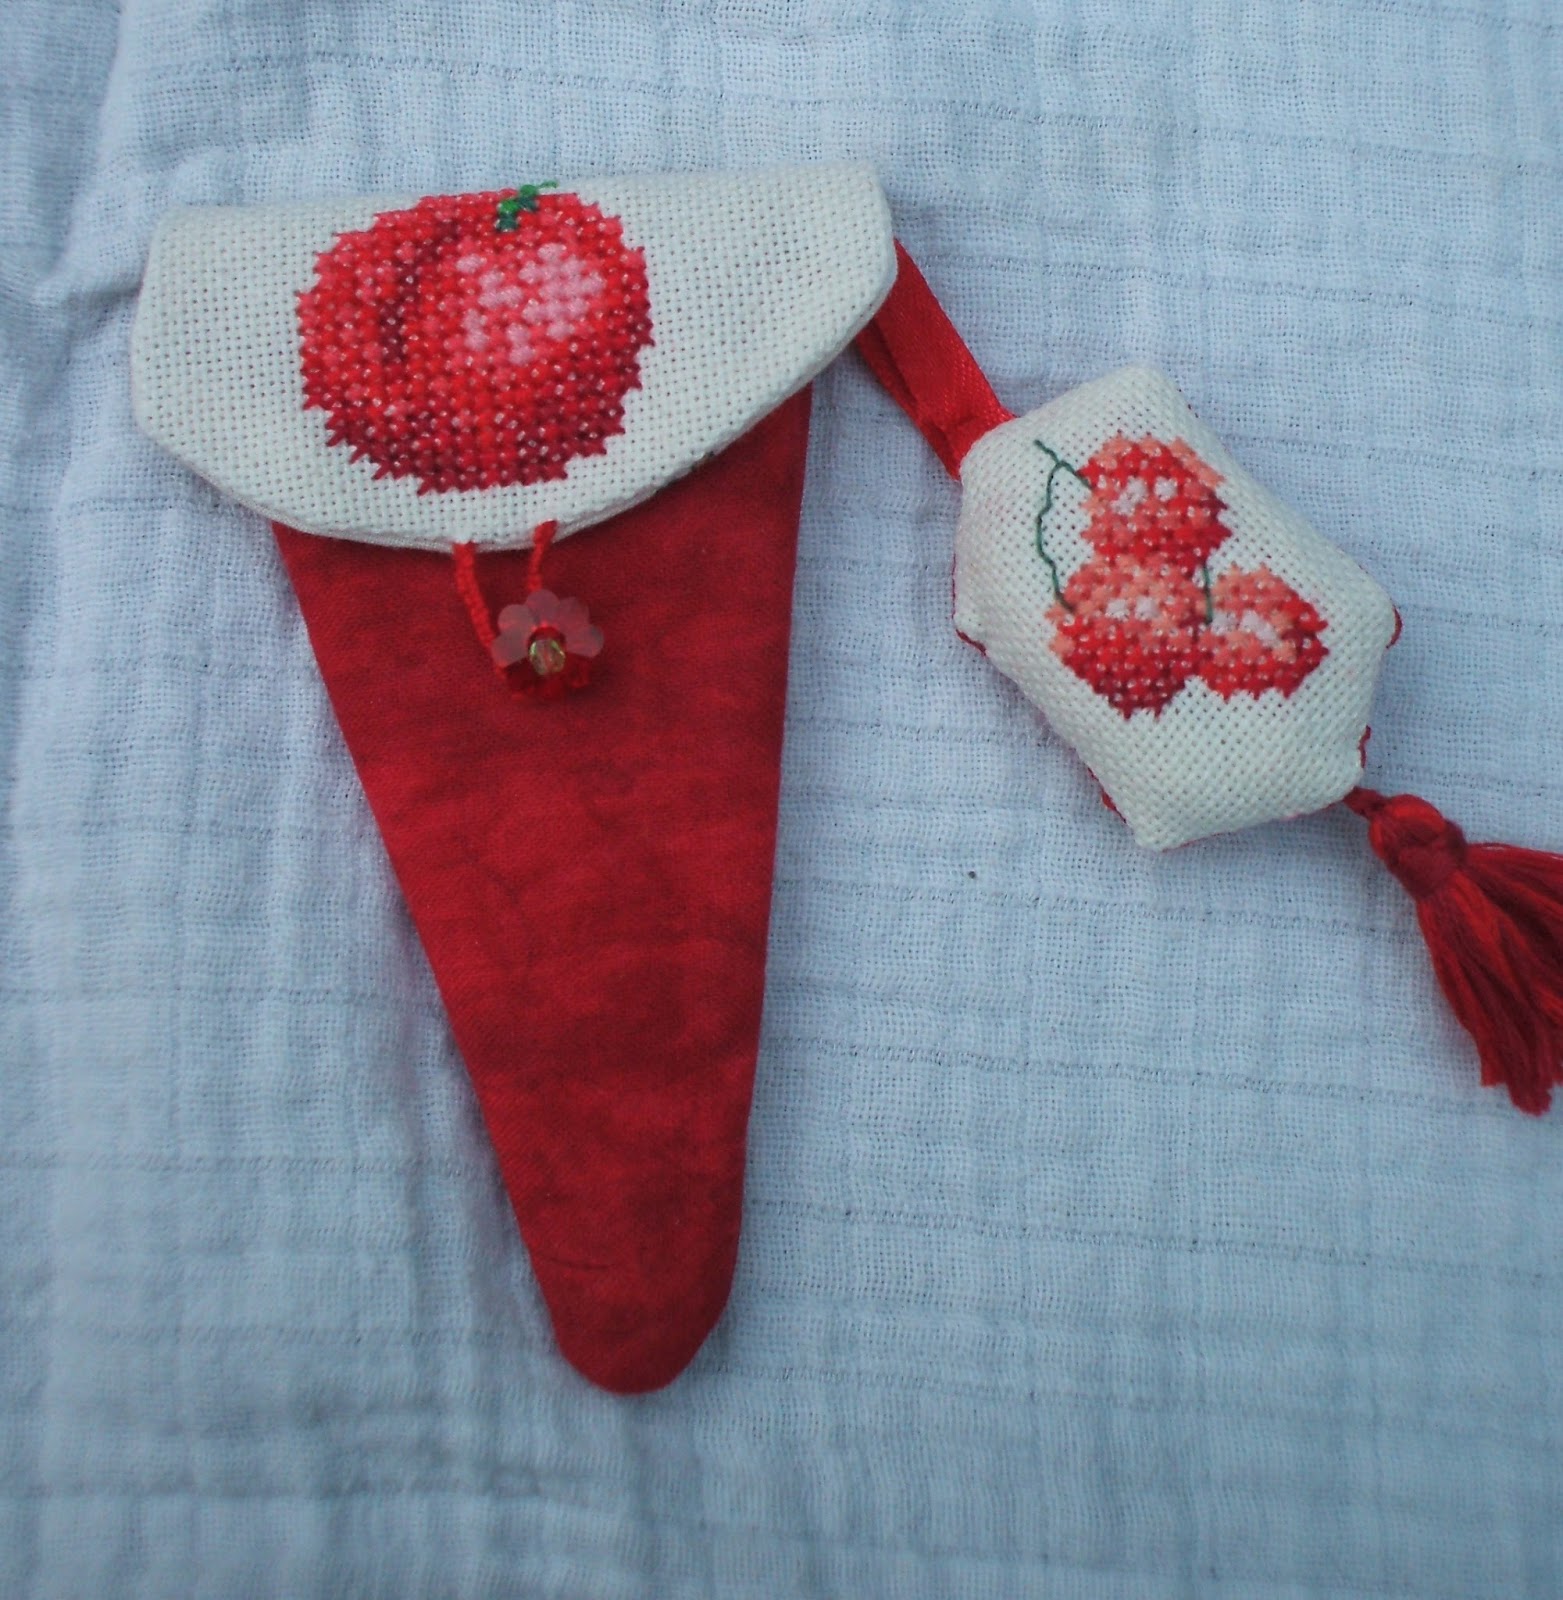
Full of doubt as to what I was doing for this but knowing that even if I skipped the apple completely and just went with the strawberry and raspberry it would not be "enough" I decided to keep going with the embroideries thinking that at worst I'd have a set of fruit that went together as they all came from the same pattern. I looked at the scraps of  embroidery fabric I had left that was the same as what was already present in the other embroideries and had a think as to what I could do with them. I still wanted to go with a sewing kit but couldn't see how I could use the strawberry for it. I decided to make a needle book out of the raspberry and considered using the cherry for a pincushion but realised that it would just look odd. I did know that with the round shapes it would look nice on the flap of a scissors case so that's what it became.

The last pattern of the 4 for the fruits was far too big for the fabric I had left as it was a long string of berries  but I picked out a couple of the berries and used them. I didn't want to make a square our of it as I had the idea of a single dangling tassle at the bottom so sacrificed 2 of my hexagon papers to make elongated hexagons and using a bit of red fabric as the backing and a scrap of ribbon I had on my desk I made a scissors fob out of it.
By the time I'd finished all these pieces I realised that I could make a box with the strawberry if I lined pieces of cardboard with fabric, so, as I didn't have any fabric glue, I had to do it the old fashioned way: by stretching the fabric over the pieces of cardboard and then carefully sewing a second piece of fabric to the first. The piece you see above is the base which was given a piece of felt as the outer side so I had to stretch the lining first before adding the felt. For all the other pieces I stretched the outer fabric over the card and sewed down the lining. I needed more fabric around the edges of the strawberry than I had so I sewed some strips of red batik to the outside of the embroidery and placed that on 2 pieces of batting (one smaller than the other to make it dome a little) and then stretched it around the cardboard. I then sewed all the pieces together using DMC perle thread and a large needle - it was rather painful sewing this together and by the time I was finished my hands really hurt.
I wanted to be able to fully open my box so didn't sew up the sides of it As you can see I also added 2 little pockets to 2 of the sides. What isn't so visible in these photo's is that the box is covered with read and white fabrics - 2 red and 2 white for the lid and 2 red and 2 white for the box itself - swapping them round so no 2 are next to each other.

Stats for all the items:

Apple:
Colours: 11 DMC colours blended together to create 30 different colour groups.
Fabric: White 28 ct Even weave
Size: 2 1/2" wide x 1 3/4" high / 6,35 x 4.45 cm

Berry:
Colours used: 6
Fabric: White 28 ct Even weave
Size: 1/ 3/4" x 1 1/4"

Cherry:
Colours used: 6
Fabric: White 28 ct Even weave
Size: 2 7/8" x 4 1/4"

Raspberry:
Colours used: 7
Fabric: White 28 ct Even weave
Size: 2 7/8" square.

Strawberry:
Colours used: 10
Fabric: White 28 ct Even weave
Size: 5 1/4" wide x 5 1/4" deep x 3 1/4" high

Monday 23 September 2013

Mystery project A complete

This was made for the #stitchingpirates Sailing the fruit contest however as the rules say that there must be 2 pieces of fruit this is not my final entry - I need to add something else before it is eligible hehe. That said I just couldn't wait to share as I'm rather pleased with the end results.

When I first saw the competition my eyes lit up as I have been wanting to make the patter for this ever since I saw the pattern in a magazine called Ariadne way back in September of 1989 and I've been keeping this magazine for this very pattern ever since. I always looked at it and thought - this is too difficult - I can't do this. The main reason being that it's 3 threads over 2 on 28 count even weave, not just any old 3 threads but 1 - 3 different colours of floss per 3 threads that get used. with just 11 base colours I created 30 colours of blended thread and only 2 were 3 the same colour together. As a result it used a LOT of thread and I used more than 1 1/2 skeins of one of the reds and used a lot of all the other colours too. Towards the end when I had again ran out of red I was looking at the bits of leftover floss from the other combined colours to find enough to finish - I had the same issue with the orange, however I wasn't able to find enough of that so, as I didn't want to wait till Wednesday when I'd have more money for floss I decided to look at what I did have and use an alternative to the orange 
Before It looked like that it looked like the picture above - reminded me a bit of those Caribbean hats with fruit on them that they used to do on adverts.  and I was wondering if it would ever come out right - fortunately it did but it was really fiddly to do.


I dyed a bit of leftover corset rope (as I call it - it's a really thin cotton rope) with coffee to make it brown and used that as the "stalk" I used black floss to make the "fluff" you find at the base of apples.

Size: 2 1/2" wide x 1 3/4" high / 6,35 x 4.45 cm

Sunday 22 September 2013

IHSW update

 I got quite a bit more done during the IHSW this weekend. So much more that I actually finished something stitching wise - just need to make it into what it needs to become. I also had a great time chatting with my friend Carla, so much so that time just flew!
 
This is the completed embroidery part of my mystery project A which I finished today. I had a spot of bother with being able to finish as I'd run out of the orange 741 with just 20-30 stitches left so I decided to use 740 instead for those  last stitches instead of waiting till Wednesday when I had money to get more.
In the mean time I finished this little mini quilt top made of leftover squares that didn't make it into my hexagon quilt or were too small for the hexagon quilt. The smallest squares are 1" /2,54 cm square. The quilt is 14 inches / 35,56 cm square

Thursday 19 September 2013

Recycled plastic... Part 2

Having used part of a large red plastic bag to complete my recycled plastic bag earlier this week I had a good chunk of it left. It seemed a huge waste and contrary to the theme of recycling to have such a large amount of the bag leftover to just throw it away, even if it was into the plastic recycling bin, so I decided to cut what was left into 3/8"/ 1 cm strips and crochet them into a little basket. I used my size 10 hook, which is a size P in the USA and a 000 in the UK

Crocheting plastic strips is hard work, even when they are as skinny as the ones I was using so my hands soon complained about life so it took a bit longer to make than it would normally have done to make a same sized basket from yarn. I have no idea how many strips i used but I used a large expensive clothes shop bag so it was rather on the large size and quite thick. This did result in a fairly sturdy basket which can be used to keep things in.

The basket is roughly 4 inches / 10 cm in diameter and 5 inches / 12.5 cm high.

Tuesday 17 September 2013

Finish it in 2013 Update blog and WIP update post

It's been a while since I last made an update post like this so here is an overview of where everything is:

New Projects:

I started a "large" and complicated new cross stitch project this year based on a photograph by a really talented Alaskan photographer who was incredibly kind and said I could make a cross stitch of it. The photographer is Mike Gates, go check out his site - his work is amazing!

The pattern was made for me as a prize for winning a competition on dA. It's 10 inches wide  x 14 1/2 inches high = 180 x 261 stitches on 18 ct Aida and it uses 147 colours. I am truly intimidated but I did ask for the pattern to be as close to the photo as possible and didn't limit size or colours and I certainly got what I asked for!

In February I dyed the fabric for this using coffee. I started stitching in March

 Update: The first 3 sections are complete and part of the 4th section has also been done.

Mystery project A and B:


New completed projects:

See the Finished in 2013 tab of the blog for my finishes :)

The Current WIP's:


8th century tile floor embroidery in greens and blues. 
 Update: I have finished the outlines for the border and done quite a bit of the filling in.


The UFO's:


2 sleeping bunnies - a Priscilla babyland embroidery - about half done but I *so* hate doing 1/4 and 3/4 cross stitches.

Dog embroidery (portrait) made from a photo years ago by a company - about 1/5th done.

Dog embroidery (standing) made from a photo years ago by a company - barely started.

Autumn leaves needle book WIP - embroidery is 1/2 finished.

Sampler - started
Update: I am behind with the TAST (see side bar) and haven't worked on it since the last update so added to UFO list.

Sagittarius star sign by Lanarte - central area complete
Update: No progress made on this.

Recycled plastic...

Yet another contest entry (I've been doing a lot of them this year too) This was created for the recycling and reusing contest at #projecteducate on Deviant art, as part of the the Artisan Crafts fortnight and I got it completed at the very last minute (I seem to be making a habit of that too hehe)

I had learnt how to do this at the arts centre last year when they had an open day and you could sign up for several free classes - I chose this one as it looked like fun and seemed simple to do - which it was!
I'm going to save my hands and do a copy paste from the post at deviant art to show how I made this.

What I did:
  • I took a lot of plastic bags from shops and cut out shapes I liked the look of or colours that matched what I had going.
  • I took a large plastic bag to use as the base and cut off the side seams and handles.
  • I took all my bits to the ironing board I'd already previously covered with greaseproof paper and turned the iron onto a low setting.
  • I then placed another sheet of greaseproof paper on top and started ironing the layers together, trying to take care not to melt the platic too much but also not too little.
  • The resulting sheet was trimmed straight along the sides and one edge and the top edge that was to be the flap was cut to echo the shapes along that edge. (which is why it looks a bit crooked - It doesn't help that I'd slightly overheated the plastic there lol)
  • Then I sewed some decorative lines on the plastic using black thread.
  • A strap was made from a thick red plastic bag that I'd cut 2 strips from the base without cutting the side seams - I cut one side open on each and cut the folds of the base of the bag so that I ended up with 2 long strips that were 4 layers thick each.
  • I placed them on each other and sewed them together along the sides.
  • I sewed the side seams of the bag closed and, by folding the bag so that the side seam was against the middle of the base I sewed a line to make the base of the bag.
  • Last of all I added the strap to the bag.

Size: 11 1/2 x 13 1/2" / 29.2 x 34.2 and will take an average sized laptop.

Hexagon flowers

On Deviant art the Artisan Crafts Community Volunteers hold a monthly challenge The august challenge was "memories" and we were free to interpret the theme any way we wanted. This entry was made for the August #CRArtisanCrafts's challenge. This is what I wrote on my entry:

I had a long think about it and decided to make the first patchwork thing I had ever made: An English Paper Pieced hexagon patchwork pincushion.

The reason I chose this as the project for the #CRArtisanCrafts August Artisan Crafts Monthly Challenge theme was because I still remember how pleased I was when I was finally given the Habitat kit to make it that I'd been looking at longingly for so many months before for my birthday. This was waaaay back in the 70's when Habitat sold such things and they had a tall rotating rack with crafty things one could make. The patchwork hexagon kit caught my attention and I wanted it *so* much but I didn't have enough pocket money to spend on it. So every time we ended up in Habitat I went to that rack to see if they were still there and every time I was relieved to see this was the case. I kept on saving my pocket money to buy it but in those days I didn't get much so it was taking a long time.

I had some trouble learning how to do the corners and as my mother insisted that I basted through the paper and I wasn't so good at removing them then I wasn't able to re-use the papers but I enjoyed making it and am sad that I no longer have it as it was lost in one of the many house moves we had back then.

I started with just the one - the white one but had so much fun picking colours and sewing them together that I soon had a few more sewn and ready to stuff. I needed to get a new bag of stuffing so it was some time before I got round to finishing them but I managed to do it *just* before the deadline.

I ended up winning one of the two prizes for this challenge which was a bit of a surprise as I was sure someone else would win as there were so many wonderful entries.
 
These are completely hand sewn 1"/2.54 cm sided hexagons made with 14 different fabrics per pincushion and are stuffed with poly stuffing

Summer 2013 souvenir...

As always when I've been off on holiday I pick up a stitching magazine with a kit of some sort to take home and embroider. This is the result of the Issue 268, Holiday 2013, Cross Stitcher magazine, free kit called Rory Raccoon. The flowers in the magazine were not yellow and gold but 2 shades of pink, however my pink aversion got the better of me and I changed it to 2 shades of yellow instead. I swapped dark pink (DMC 602) for the lighter yellow (DMC 973) and the lighter pink (DMC 604) for the darker orangey yellow (DMC 972)

I also didn't like how much empty space was at the bottom of the pattern so I added some additional flower buds, stems and leaves to fill it out a bit.When it was time to put the embroidery in the frame that was included in the kit I again did my own thing as I didn't have any fabric glue so couldn't glue the parts together as instructed.  I first stitched the embroidery with a running stitch (after putting a bit of muslin behind it to stop the green from showing through) to the back of the frame which is also felt. I then used some yellow floss and french knots to fix the front of the frame to the back of the frame which really ties the whole thing together in my opinion.

Number of colours: 7
Size of embroidery: 3 1/8" x 2 1/4"/7.9 x 5.7 cm
Frame: 5 1/2" x 4 1/8"/ 14 x 10.5
Design by: Lucie Heaton

Needle tatted flower

Way back in June I made this needle tatted flower as an entry for the Get Crafty Contest over on Deviant art I had never needle tatted before so it was a challenge to make something using one of the tutorials offered as part A of the competition.

It was supposed to be a flat flower but as I didn't count properly or check to see how things were going as I cheerfully worked on this I eventually discovered that it was anything but flat. This was where the green bit and the wire came as as I decided to just make a more realistic flower from what I'd made so I made a spiral out of florists wire to help hold it up and joined that bit to another bit of florists wire, that I'd covered with more tatting + some wire tatted leaves that I'd fixed in place while tatting the stem, and made a loop of each end to join them so the head of the flower moves independently to the stem. I then fixed the flower to the stem with some green loops and added some yellow stamen in the middle for some more realism.

I'm really proud of this flower, it doesn't live in the garden any more but on my desk in a cleaned jam jar.

I did not win this competition but it was fun joining in!


The border strips that are not...

Last January I was happily living in the blissful dream that I could do a gazillion tiny 1/2" diamonds to be able to attach the border strips to the quilt, I have awoken from this dream and realised that this will be too difficult for me to achieve. So I decided to use up the strips of hexagons in other ways. First I made a lovely reversible cover for the nook my darling bf had given me because he wanted me to enjoy even more books.

I had to do quite a bit of seam ripping to get the right lengths of strip for the cover + do some creative adding of the hexagons to make the flap. I made it reversible as it seemed a shame to waste the opportunity to do so as it's quite easy to make reversible when you are joining hexagons together by hand.

The entire cover is made by hand and contains 350 1/2" mini hexagons, 175 for each side, the flap is weighted with an old Belgium 0,20 Frank coin I had lurking in a drawer.
It's 6 3/4"/17.14 cm square

I still had some of the strips left so went on to make a matching reversible pouch for the cable, which certainly makes it easier to find the cable in my drawer of cables - I think I'll be making more cable pouches now hehe.

The entire cover contains 96 1/2" mini hexagons, 48 for each side.

It's 4 1/2" x 3 1/4"/ 11.4 x 8.5 cm

Having finished the cable pouch I still had the rest of the rather longer greens, blues and whites left and I sewed some of them together - this project isn't complete yet but I did use the scraps to make the little coin purse you can see above. It's just the right size for a few coins, a Lego minifig or 2 AA sized batteries.

The entire cover contains 40 1/2" mini hexagons, 20 for each side.

It's 2" x 2 1/2"/ 5 x 6.35 cm

Thursday 8 August 2013

Insane Hexagon update

If you had thought that I'd forgotten about this project you could be forgiven as I've not worked on it or updated any progress for over 18 months. I did pick it back up again in May when I was given new meds that made concentrating on anything complicated almost impossible. I have since completed all 3 reds that I could made from the fabric I had.
  
Next up: cutting the yellows.

These are (from top to bottom) the 33rd, 34th and 35th blocks in this project.

For more information see:  The insane hexagon quilt
To see all the quilt blocks together look here:  Insane Hexagon Project

Monday 20 May 2013

IHSW update post

So last weekend it was IHSW and I got a fair bit of work done but not as much as I'd hoped.

Things I was to work on:
  1. Awning for the neighbour that I started last autumn and MUST finish soon.
  2. Mike's Mushrooms as it's high time I picked that up again.
  3. Possibly also do a bit more of the floor tile.

What I managed to do:
  1. Working on the awning is hard work - it's horrible poly and the whole piece weighs 5.4 kg (that's 11.9 pounds) so it is physically draining for me to work in it. I got the side seams done - sounds a lot easier than it was in reality. I started pinning the top seam. I'll do a proper blog on this project from hell soon.
  1. Mikes Mushrooms. As you can see I got quite a bit of the biggest mushroom done and I finished the last little bit of the middle one.
  1. Floor tile: I managed to do the last little bit of the corner loops so they are now complete and the frame is now 1/2 way done.
So not as much cross stitching done as I'd have liked overall but I did as much as was physically possible.

Thursday 16 May 2013

The TUSAL jar

Every month on or around the new moon I post a picture of a jar of threads that are leftover from projects of the lunar month that has just past. My dear friend Carla asked me what size my jar is and what I do with the threads when the post has been made. Since this involves a photo or two I decided to make a little blog post with my reply.

First of all I measured the contents of an empty jar by filling it to the bit where the neck starts with water and then pouring that into a measuring cup that also has cups marked. It filled 1 1/4 cup. I rooted around and found the last jar of this shape that still has the label on (the company changed the jars from this nice shape to a boring normal jar shape recently) It says it contains 450 grams of jam which converted to imperial is 15.873 oz or 0.992 pounds, so that should hopefully answer the size of jar question.
Then on to what I do with my threads - or more accurately what I don't do, as all I do when I have made the monthly photo is put the lid on the jar, add a sticker with the month and year and put it on a shelf as I find the strata in the jars very pretty. I've currently got them on the large wall unit above the TV but I'm planning on hanging a shelf or two in my computer corner for them to go on instead.
You will see that the jars change orientation after the 4th one from the left. I did that because that's where 2012 becomes 2013, so everything on the left is 2012 and everything on the right is this year's.

And there you have it.. all you wanted to know about my TUSAL jars and more hehe.

IHSW and UFO #11 The 8th century floor tile

It's IHSW weekend! I again have a child free weekend and hope to get quite a bit of stitching done.

Things I'm going to work on are:
1. Awning for the neighbour that I started last autumn and MUST finish soon.
2. Mike's Mushrooms as it's high time I picked that up again.
3. Possibly also do a bit more of the floor tile.

Speaking of the floor tile it's probably a good idea to show you where I am with it now.  Above you see where it was last time I updated you. I managed to get more of the brown (3021) thread that I needed Tuesday afternoon and I completed the framework stitching. I have also just about reached the corner with the colours as I only have 18 stitches left to do on the last dark green loop and then the little bit in the corner before I've reached the half way point with filling in colours.
While working my mind has been busy thinking about the centre area. I'm not so sure I want to go head and do the tile floor filling I had planned as I keep thinking of just using this as a frame for another embroidery - but I'm not sure what to do yet.  I keep thinking of doing something in blackwork, possibly an owl or a bit inspired by the floor tile I saw in Maastricht in the St. Servaas church last week when I was there with my bf. Time will tell what I end up doing as right now I have plenty of time to think about it :)