
Showing posts with label Fob a month. Show all posts
Showing posts with label Fob a month. Show all posts
Friday, 29 May 2020
Joining the Dots - Part 3 - 5 Years Later


Friday, 14 December 2018
Friday Freebie: Fob a Month - December

Friday, 9 November 2018
Friday Freebie: Fob a Month - November
Friday, 12 October 2018
Friday Freebie: Fob a Month - October
Friday, 14 September 2018
Friday Freebie: Fob a Month - September
Saturday, 11 August 2018
Friday Freebie on a Saturday: Fob a Month - August
Friday, 13 July 2018
Friday Freebie: Fob a Month - July
Saturday, 9 June 2018
Friday Freebie: Fob a Month - May and June!
Friday, 13 April 2018
Friday Freebie: Fob a Month - April
Friday, 9 March 2018
Friday Freebie: Fob a Month - March
Friday, 9 February 2018
Friday Freebie: Fob a Month - February
Friday, 12 January 2018
Friday Freebie: Fob a Month - January
Sunday, 7 February 2016
It's been a while
A long, long while. December was crazy busy and January somehow became the month of recovery. I don't talk about it much but my health isn't too brilliant so after crazy busy times I need recovery time and this time it took a whole month.
During the month I had time to reflect, as one does in January, on what I'd been up to last year and what I want to do this year. One thing I realised is that back to back stitching deadlines are not for me. Yes it's fun making something new every 2 weeks - the ornaments of the month that I posted on the Nerd Central Command International website and the fob a month I posted here but then stopped doing due to lack of time and energy, though I did plan on continuing with them it somehow didn't happen 3 months in a row. I'm going to continue giving free patterns here, but not on a schedule. This will give me more time to make things I want to make and not have to worry about specific things that people are expecting me to make.
One thing I have been playing with as a plan is making 3-D ornaments and this I really want to do as I think it will be fun. So look out for them, and the free patterns, during the coming year.
The other things I want to work on this year are my WIPS, With all the deadlines last year they got left by the wayside and some are in danger of becoming UFOs *yikes*
I will continue joining in with competitions that are hosted on the deviantart group #stitchingpirates. The current one is called Gamers Delight and I have a nice plan for my entry, which will be a creature from the Doctor Who: Legacy game I enjoy so much, but don't play as much as I'd like as I can't stitch and play at the same time. I hope to post almost daily updates on this project once I start it.
I will be blogging about how to make an almost T.A.R.D.I.S. like bag, a bag that can hold so much more then it looks like it should be able to carry, which the Harry Potter fans might see as a bag with an Undetectable Extension Charm, much like Hermiome Granger's beaded bag, but not as big on the inside. The important bit about this bag is that it meets RyanAir's rules about the second bit of hand luggage so it can carry extra stuff when travelling. This will be the first thing I blog about as I do have deadline for it - in less than 2 weeks from today it has to be ready for the recipient to collect it.
After the wall of text it's high time I gave you something nice to look at so here are some pictures of things I finished but have not yet blogged about.
The last 3 are all Ornaments of the Month for December.
 This was going to be the Fob a Month pattern for November but alas it was not posted in time for that, however I will give the pattern soon.
 I don't think I ever got round to posting this either but.. not only did I complete this but I also won first prize for finishing this first in the speed stitching contest!
I have a few more things to post but they are still on the way to the intended recipient and as they are a surprise and I know at least one of them reads this blog I'm going to wait till after they arrive to share them.
That's all for now.. I'll be back soon with the start of the bag project!
During the month I had time to reflect, as one does in January, on what I'd been up to last year and what I want to do this year. One thing I realised is that back to back stitching deadlines are not for me. Yes it's fun making something new every 2 weeks - the ornaments of the month that I posted on the Nerd Central Command International website and the fob a month I posted here but then stopped doing due to lack of time and energy, though I did plan on continuing with them it somehow didn't happen 3 months in a row. I'm going to continue giving free patterns here, but not on a schedule. This will give me more time to make things I want to make and not have to worry about specific things that people are expecting me to make.
One thing I have been playing with as a plan is making 3-D ornaments and this I really want to do as I think it will be fun. So look out for them, and the free patterns, during the coming year.
The other things I want to work on this year are my WIPS, With all the deadlines last year they got left by the wayside and some are in danger of becoming UFOs *yikes*
I will continue joining in with competitions that are hosted on the deviantart group #stitchingpirates. The current one is called Gamers Delight and I have a nice plan for my entry, which will be a creature from the Doctor Who: Legacy game I enjoy so much, but don't play as much as I'd like as I can't stitch and play at the same time. I hope to post almost daily updates on this project once I start it.
I will be blogging about how to make an almost T.A.R.D.I.S. like bag, a bag that can hold so much more then it looks like it should be able to carry, which the Harry Potter fans might see as a bag with an Undetectable Extension Charm, much like Hermiome Granger's beaded bag, but not as big on the inside. The important bit about this bag is that it meets RyanAir's rules about the second bit of hand luggage so it can carry extra stuff when travelling. This will be the first thing I blog about as I do have deadline for it - in less than 2 weeks from today it has to be ready for the recipient to collect it.
After the wall of text it's high time I gave you something nice to look at so here are some pictures of things I finished but have not yet blogged about.
 |
| Ornament of the Month - October |
 | |||
| Ornament of the Month November |
 |
| Ornament of the Month - November |


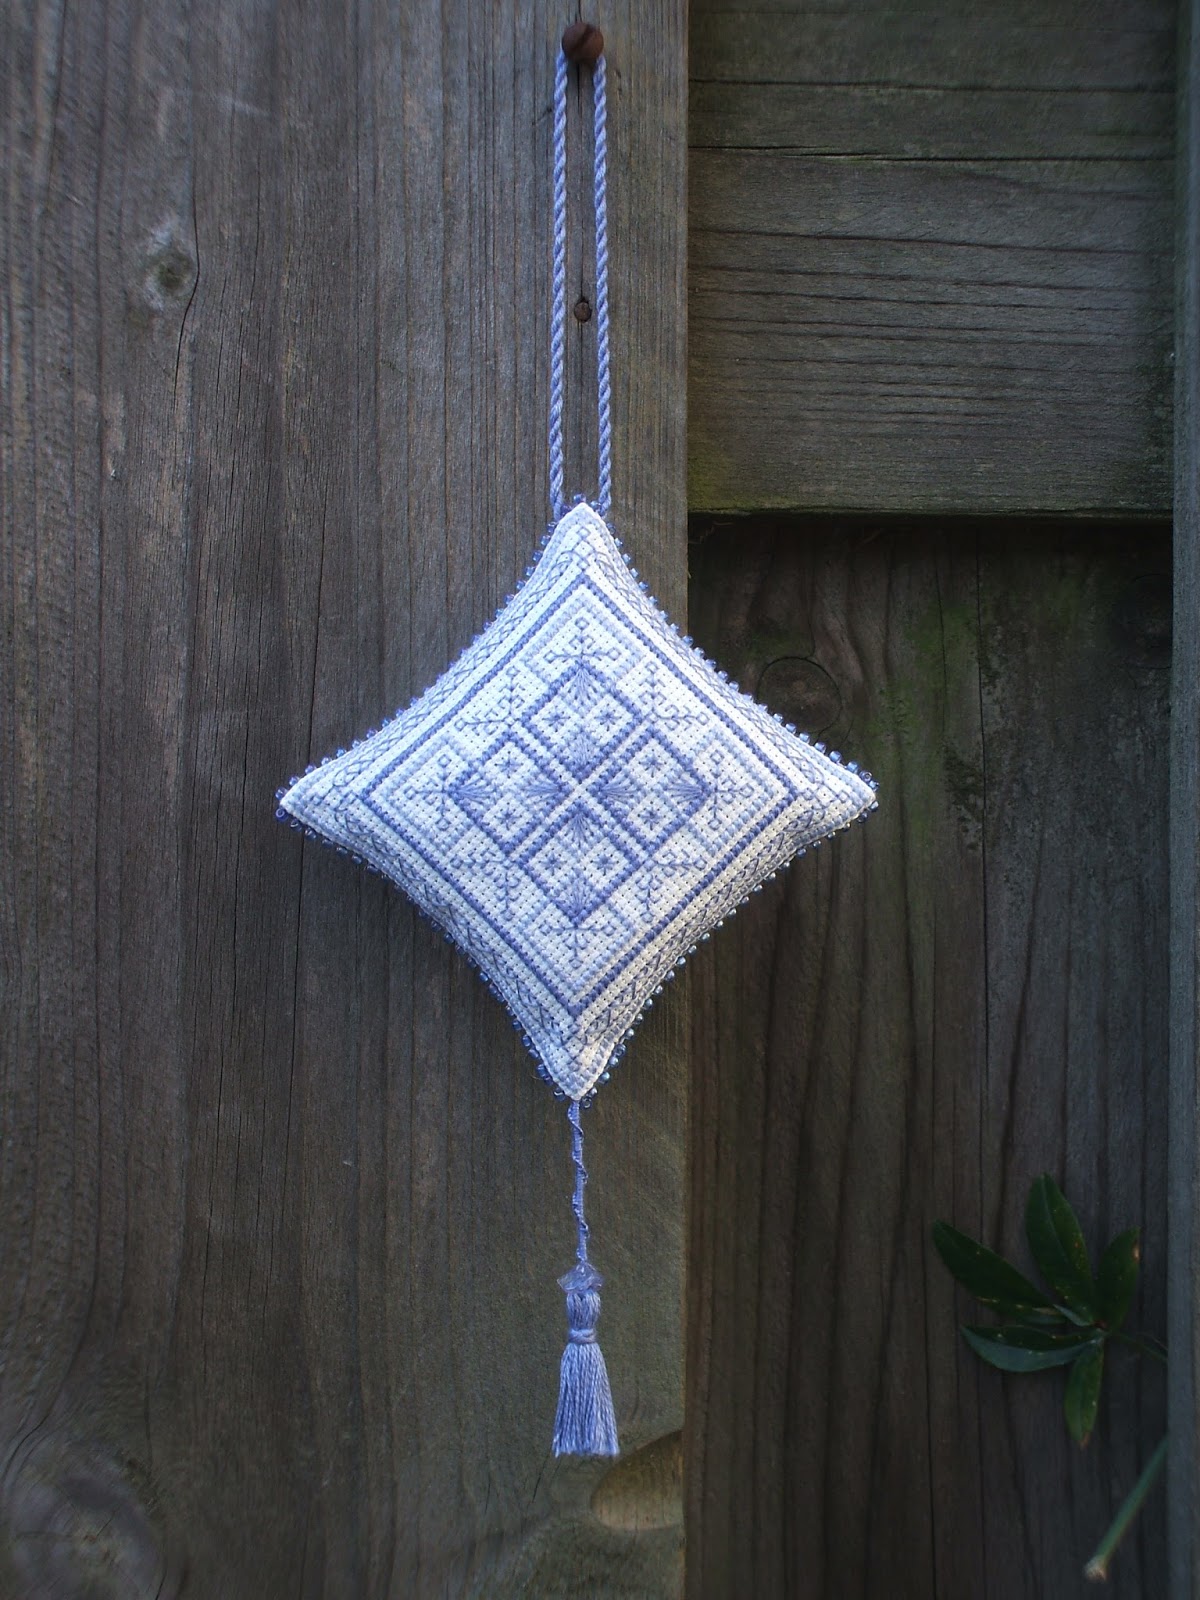
The last 3 are all Ornaments of the Month for December.


I have a few more things to post but they are still on the way to the intended recipient and as they are a surprise and I know at least one of them reads this blog I'm going to wait till after they arrive to share them.
That's all for now.. I'll be back soon with the start of the bag project!
Saturday, 17 October 2015
Fob a Month - 8
With autumn on our doorstep my mind turned towards that as a theme, I chose a toadstool as that is really one of the more visible things you can see that herald autumn other than the falling of leaves. I used a lovely picture by ky-sta over on deviantArt which can be found here: Red Mushrooms 9 and did 2 things with it.
The first thing I did was do a direct pattern conversion and then reduce the colours from around 100 to a "mere" 43. I stitched this and then added small beads to create the dots of the toadstool.
The second thing I did was use the picture as an underlay over which I then placed the colours over the top to create a pattern with just 15 colours, which I also stitched.
The results are 2 different toadstools made from the same picture using mostly the same colours made into a fob. Because I chose to use brown 28ct jobelan the fob is again rather on the large side but it does make it about the right size to use as an ornament as well.

The fob is 3" round. The realistic toadstool is 29 x 28 stitches. The stylised toadstool is 29 x 25 stitches.
What you need to make the example above:
- 2 pieces of 5 1/2" square 28ct brown jobelan
- DMC in the colours on the patterns
- Mill Hill Magnifica colour: 10010
- Your stuffing of choice
- Bordeaux craft thread for the cord
- White rick rack: 11 1/2" long and about 5/16" wide
- Water soluble pen
- Matching thread to sew
- Contrasting thread to baste with

Randomly stitch the beads onto the realistic toadstool as the spots.
Use a 3" round biscuit/cookie cutter and a water soluble pen to mark a circle on the back each embroidery, making sure to keep the embroidery centred.
Use the contrasting thread to baste the rick rack onto the front of one of the embroideries, use the line on the back as your guide and make sure the rick rack is centred on the line (a bit fiddly but not too difficult) overlap the ends a little and make sure you tuck the endings into the seam line.
Cut the circle out making sure to leave a 1/4" seam allowance.
Pin the cord in the top centre of the embroidery making sure the have the loop placed on the embroidery and the ends sticking out, as you don't want the loop on the inside of your ornament when stitched *wink*
Place the two sides right sides together and pin into place making sure to line up the circles.
Starting at the bottom stitch the 2 sides together carefully making sure to sew through the rick rack and leaving about 1 1/2" to turn - don't remove the basting thread yet!
Snip the seam allowance making sure not to go too close to the sewing line and carefully turn your work the right way round.
Check to see if all is sewn down properly before removing the basting thread and sewing the fob closed.
I hope you enjoy this pattern, please do share a link to yours if you make it!
The very delayed... Fob a Month - 7
The reason it's late is mostly that when the fob was due I was in the middle of redecorating my living room and somehow after that was done I didn't get round to finishing it.
This month's fob was the brainchild of my bf who wanted to have a go at designing a cross stitch pattern as well. I made the actual pattern but the idea of it and what elements to use were his decisions. With Doctor Who starting the new season the day after this fob was due he wanted to make something that reflected the show and the time of year it started. The stories are adventures in space and time so the clock represents time and the star sign represents space, with Virgo being the star sign at the time of the first episode of the season with the added effect of hands of a clock which was quite unintentional.

The fob is 3" square. 46 stitches square.
What you need to make the example above:
- 2 pieces of 5 1/2" square 14ct black Aida
- Kreinik #4 braid: 001L, 002 and 012L
- Your stuffing of choice
- Black craft thread for the cord
You can download a clock version here: Fob a Month - Clock version
- If you prefer a clock use the alternate pattern given, remember you can set the clock to any time you like by changing the direction of the hands.
- If you would rather use another star sign go for it! Almost any star chart on the internet can be used to make it.

I used the usual method for making a biscornu and started by doing an outline of 42 backstitches per side 3 stitches away from the finished cross stitch. On the front I used copper Kreinik, on the back gold and the 2 sides were stitched together using silver which gives a really nice finish.
Remember to add the cord at the 12 O'clock position so it hangs the right way up!
I hope you enjoy this pattern, please do share a link to yours if you make it!
Friday, 4 September 2015
Joining the Dots - Part 2

If you wish to make the fob, pincushion and scissor case as a matching set you will need a piece of 18ct Aida or 32ct linen of at least 10" x 15" or 7,5" x 20" - you need to start pretty close to the edge and to one side to make sure you have enough fabric left for the rest. You need a 1/4" seam allowance for each piece so the sections must be stitched at least 1/2" away from each other using the back stitch lines as the counting point.
The scissor case is 3 3/4" square. 68 stitches square.
What you need to make the example above:
- 1 piece of 5 1/2" x 5 1/2" 18ct Aida or 32ct linen if you are ONLY stitching the scissor case - otherwise see above for the amount needed.
- DMC 3347, 3348 and 3827
- One button - I used a 1/2" heart button.
You can download the pdf pattern here: Fob a Month - 6 - Scissor Case

Once the cross stitching is done do the back stitch outlines.
Press the completed stitching from the back to make sure there are no creases. Then cut the pieces out 1/4" away from the back stitch lines.
If you want to include a tassel then make it now.
Place the 2 pieces wrong sides together, fold the seam allowances in and whip stitch the sections together, making sure you tuck the tassel between the two sides in the corner opposite to the stitched side of what will be the inside. As you do not need to turn the work or stuff it you can completely close the seam straight away.

Fold the two sides that in the pattern show as being the larger triangles outside the grey triangle towards each other. Whip stitch the sides together from the outside reusing the stitches you used to stitch the 2 sections together, it's not easy to see but you can feel the holes with your needle or use the fabric as a guide. If you do small stitches it won't matter too much if you don't do it through the previous holes.
Put your scissors in the case and fold the case closed then place your button just below the point along the seam line. Hold in it place and take the scissors out of the case. Stitch in place using a colour thread of your choice. Then make a button hole stitch loop, I used only 1 strand of floss for the starting loop but more is perhaps more practical. A nice tutorial showing how to do this can be found here: Ysolda.com: sewn button loops
Note: If you leave the button off and make a larger loop of ribbon or cord to hang it with you could use it as an ornament in the Christmas tree! Just add some sweets (candy for the USA-ians out there) or a small gift or make it on 14ct Aida or 28ct even weave so it's larger and can hold more.
I hope you enjoy this pattern, please do share a link to yours if you make it!
Next time I will give the pattern for the little needle book, which will then be the last part of this series.
Friday, 28 August 2015
Joining the dots - Part 1

I have made 2 different options for the pincushion - the version I made and an inverse version of the top/bottom with a simplified backstitching side panel. I only stitched the front with the polka dot pattern - I left the back empty except for the backstitch lines.
If you wish to make the fob, pincushion and scissor case as a matching set you will need a piece of 18ct Aida or 32ct linen of at least 10" x 15" or 7,5" x 20" - you need to start pretty close to the edge to make sure you have enough fabric left for the rest. You need a 1/4" seam allowance for each piece so the sections must be stitched at least 1/2" away from each other using the back stitch lines as the counting point.
The pincushion is 2" square and 1"high (approx, depends on how full you stuff it). 36 stitches square.
What you need to make the example above:
- 1 piece of 8" x 8" 18ct Aida or 32ct linen if you are ONLY stitching the pincushion - otherwise see above for the amount needed.
- DMC 3347, 3348 and 3827
- Your stuffing of choice
- 2 small crystal bicones

Instructions: Fold the fabric in half before starting - on each half you
will stitch either the back or the front AND 2 side panels at least
1/4" away from the
centre line so you have 1/4" seam allowance for each side. If you are
also doing the fob you want to stitch your pieces so they are about 1/2"
away from the back stitch lines of the fob.
Once the cross stitching is
done do the back stitch outlines.
 |
| Layout suggestion (note I noticed that the centres of the side panels in this picture are incorrect, they should be the darkest green) |
Whip stitch the sections together. I found it easier to first stitch all the side panels to the front and then stitch between the sides before adding the bottom. When you have about 1" left to stitch of the last seam take a moment to add some stuffing, you want it plump but not too plump as it would then lose it's shape and become round. Then finish sewing the last bit of seam.
Last of all sew the 2 bicones in place in the same way as you did the beads for the fob.
I hope you enjoy this pattern, please do share a link to yours if you make it!
Saturday, 22 August 2015
Fob a Month - 6


The fob is 1 7/8" square. 34 stitches square.
What you need to make the example above:
- 1 piece of 3 1/2"x 7" 18ct Aida or 32ct linen if you are ONLY stitching the fob - otherwise see above for the amount needed.
- DMC 3347 and 3348
- Your stuffing of choice
- DMC 3347 for the cord and tassel
- Green seed beads
- 2 small crystal bicones
Instructions: Fold the fabric in half before starting - on each half you will stitch either the back or the front at least 1/4" away from the centre line so you have 1/4" seam allowance for each side. Once the cross stitching is done do the back stitch outlines.
Press the completed stitching from the back to make sure there are no creases. Then cut the pieces out 1/4" away from the back stitch lines.
Place the 2 pieces wrong sides together and fold the seam lines between the layers and whip stitch the 2 sides together only going through the back stitch lines, the same as you would for a biscornu, adding a green bead every other stitch, remembering to add the cord and tassel at opposite corners. (Believe me if you do forget things either get pretty complicated or you end up ripping out a whole load of stitches)
When you are about 1" away from the starting point take a moment to add some stuffing, you want it plump but not too plump. Then finish sewing the last bit of seam.
Last of all sew the 2 beads in the centre of each side using a single thread to stitch them in place by going through each side's bead, then through to the other side and repeating that 2 or 3 times for each bead.
I hope you enjoy this pattern, please do share a link to yours if you make it!
Monday, 10 August 2015
A Fob a Month - 5
As some of you may have noticed the July Fob a Month was not posted on the usual date. It was due 3 days before I was due to go on holiday and in the rush to pack there just was no time to post the fob even though I had completed stitching it. Once I got back I had almost forgotten it was due and so here we are several weeks later with the pattern at last!
After the last pattern I decided to make an easier one and felt it was high time the glow in the dark thread came out of the box to play. I stitched it on black even weave to make it show up better but if you prefer you can stitch it with black thread on a light background too.
This year I went to the Hastings Pirate day for the 4th year running and wanted to stitch a fob to reflect my holiday plans which is why I chose the most commonly known "pirate speak" word I know of which is "Arr"

The fob is 3/4" high and 3" wide. 7 x 25 stitches
What you need to make the example above:
- 1 piece of 6" x 6" 25ct black Jobelan
- DMC E940 (glow in the dark) or 310 (black) if you are working on a light fabric
- Your stuffing of choice
- Black craft thread for the cord and tassel (or just use black DMC)
- Black seed beads
- A large crystal bicone
Notes:
- The black lines are the back stitch lines needed to make the fob - for the back of the fob you can either just do the back stitches or do the pattern a second time. I did the back stitches in glow in the dark.
- If you want your fob to *really* glow use a matching Kreinik glow in the dark blending filament - it really does help make it glow!
- I make my tassels by wrapping craft thread a good 10 times around a bit of thick card that is 1/16th inch thick and 1" wide.
- I make the cord by measuring out 5 x the length I want. then I loop it around a knitting needle or chopstick and put that though a slatted chair back to hold it in place while I twist then folding it in half and putting a knot in the ends.

Instructions: Fold the fabric in half before starting - on each half you will stitch either the back or the front at least 1/4"away from the centre line so you have 1/4" seam allowance. This is one of those rare occasions that starting with the back stitching is a good idea.
Stitch the letters making sure you consult the pattern carefully for placement. Then cut the pieces out 1/4" away from the back stitch lines.
Place the 2 pieces wrong sides together and fold the seam lines between the layers and whip stitch the 2 sides together only going through the back stitch lines, the same as you would for a biscornu, adding a black bead every other stitch. On the diagonal lines I added a bead every stitch.
At the first pointy end add the loop and at the other pointy end add the tassel. About 1" before you reach the beginning of your stitching stop stitching and stuff the fob with a filling of your choice, then continue to ship stitch the sides together.
I hope you enjoy this pattern, please do share a link to yours if you make it!
Saturday, 20 June 2015
A Fob a Month - 4
A bit later in the day than usual as my youngest son came back from a 4 day school trip today and had lots of stories to tell of his time away. I also had some issues when I attempted (and failed) to get this into a pdf file - I shall have to try this again when I'm not so tired. This month's fob was entirely inspired by Pinkythepink's Mucha princess patterns which can be found in her Etsy shop. The blended threads give a smooth gradient of colour making them trick the eye into thinking there is no colour gradient at all. That also gives away this month's challenge in the pattern: blended colours.
Please don't close the browser tab or window and run away screaming! It's actually not that daunting, it's just a matter of selecting one thread of each colour you need and using them together, you don't need to do anything special at all while stitching that you wouldn't normally do anyway when using 2 threads to stitch with.
Generally the difficulty with blended threads is when you have to do a few stitches here and there but as all the stitches of the same colour are touching one another and you only need to use a combination once it should be fairly straight forward
This month's pattern gives you two options that you can use depending on how you want to finish it. If you wish to make the example I have made you will need less thread and will end up with an almost round shaped octagon. Alternatively you can make it square and perhaps turn it into a biscornu, I am giving the pattern for both.
The pattern also gives you more options! Namely you can choose which princesses colours to use - do you want to do Bella, Merida or Rapunzel? All 3? Or even another colour? The choice is yours! All 3 colour options are below along with a more muted brown in case none are to your liking.

The fob is 1 1/2" high and wide. 28 x 28 stitches
What you need to make the example above:
- 2 pieces of 4" x 4" 18ct off white Aida
- DMC threads in the colour of your choice of fob found in keys below.
- Your stuffing of choice
- Green thread for the cord, I used the colour that is 0 in the key.
- DMC or thread to coordinate
- TOHO 11-773 seed beads, they are bluish with a iridescent coating
You can download the biscornu version here
- The black lines indicate the sewing (inner line) and cutting lines (outer line)
- Use 2 strands when 1 colour is mentioned
- Use 1 strand of each colour when 2 colours are mentioned
- If you choose to make the biscornu you will need 2 pieces of 4 1/2 " square 18ct Aida or enough for 34 x 34 stitches of your chosen fabric.
Alternate colourways:
0 3853
1 3853 & 3854
2 3854
3 3854 & 3855
4 3855
5 3855 & 745
6 745
7 745 & 677
8 677
9 Ecru (only for the biscornu)
Merida:
0 3808
1 3809
2 3809 & 3810
3 3810
4 3810 & 597
5 597
6 597 & 598
7 598
8 598 & 3813
9 Ecru (only for the biscornu)
Rapunzel:
0 552
1 552 & 208
2 208
3 508 & 209
4 209
5 209 & 210
6 210
7 210 & 211
8 211
9 Ecru (only for the biscornu)
Earth:
0 300
1 300 & 975
2 975
3 975 & 3827
4 3827
5 3827 & 976
6 976
7 976 & 977
8 977
9 Ecru (only for the biscornu)
Instructions: First stitch the front of the fob, the other side can be either left unstitched or stitched with the same or another colour.
Use the inner black stitch lines to make a template, mark it out on the back of the fabric and cut the pieces out about 1/4 inch away from the inner stitching lines. Pin the loop in place making sure to have them tucked between the layers and only have the ends that will be on the inside sticking out. Turn, stuff, and sew the final seam shut.
Then add the beading by stitching a single bead in place till you reach a corner. at each corner put 3 beads on the needle when you make the stitch to make a little "picot" with the beds. At the bottom of the fob make a group of beaded tassels. I did 2 with 8 beads, one with 10 and the last with 12. You make them by putting the desired number of beads onto the needle, skipping 3 and sliding the needle back down the remaining beads making sure to put the needle through the fabric to attach each one before you start the next.
I hope you enjoy these patterns, please do share a link to yours if you make them!
Subscribe to:
Posts (Atom)