I thought I'd already done this, but apparently I had not, so this is going up later than planned or desired. I noticed it was missing because I'm preparing to stitch the February Ornament of the Month and wanted to know how much floss I needed to make the cord for the garland. Good thing I make notes and keep photos! This year's shape is not exactly simple to stuff, so it's done in parts as you work, I'll show you when in the photos. I'll also explain when things are done differently for an ornament version as of course you don't have to make this into a garland like I am. Please read the notes at the end before starting to do the finishing if you are making a garland.
 First you will need to stitch your ornament and make a backstitched outline. My photo shows it cut back to four stitches past the backstitched outlines, the fabric was bigger before then. Once stitched, you will need to cut it back to four stitches past the backstitched outlines too. I'd put dots at the top out of habit but soon realised that this was not necessary.
 Having made the fabric a more manageable size I then trimmed off the excess bits to have the ornament parts fully cut out.
 Then it was time to add some glue (or Fray Check if you have it) to the inner corners to make sure no fraying happens when you cut the fabric.
 Make sure to spread it thinly and don't get it on the threads, or they will glue to the fabric and make life very difficult later on.
 Before the glue is completely set, snip into the seam allowance towards the corners — stop one thread away if using evenweave and half a square away if using Aida.
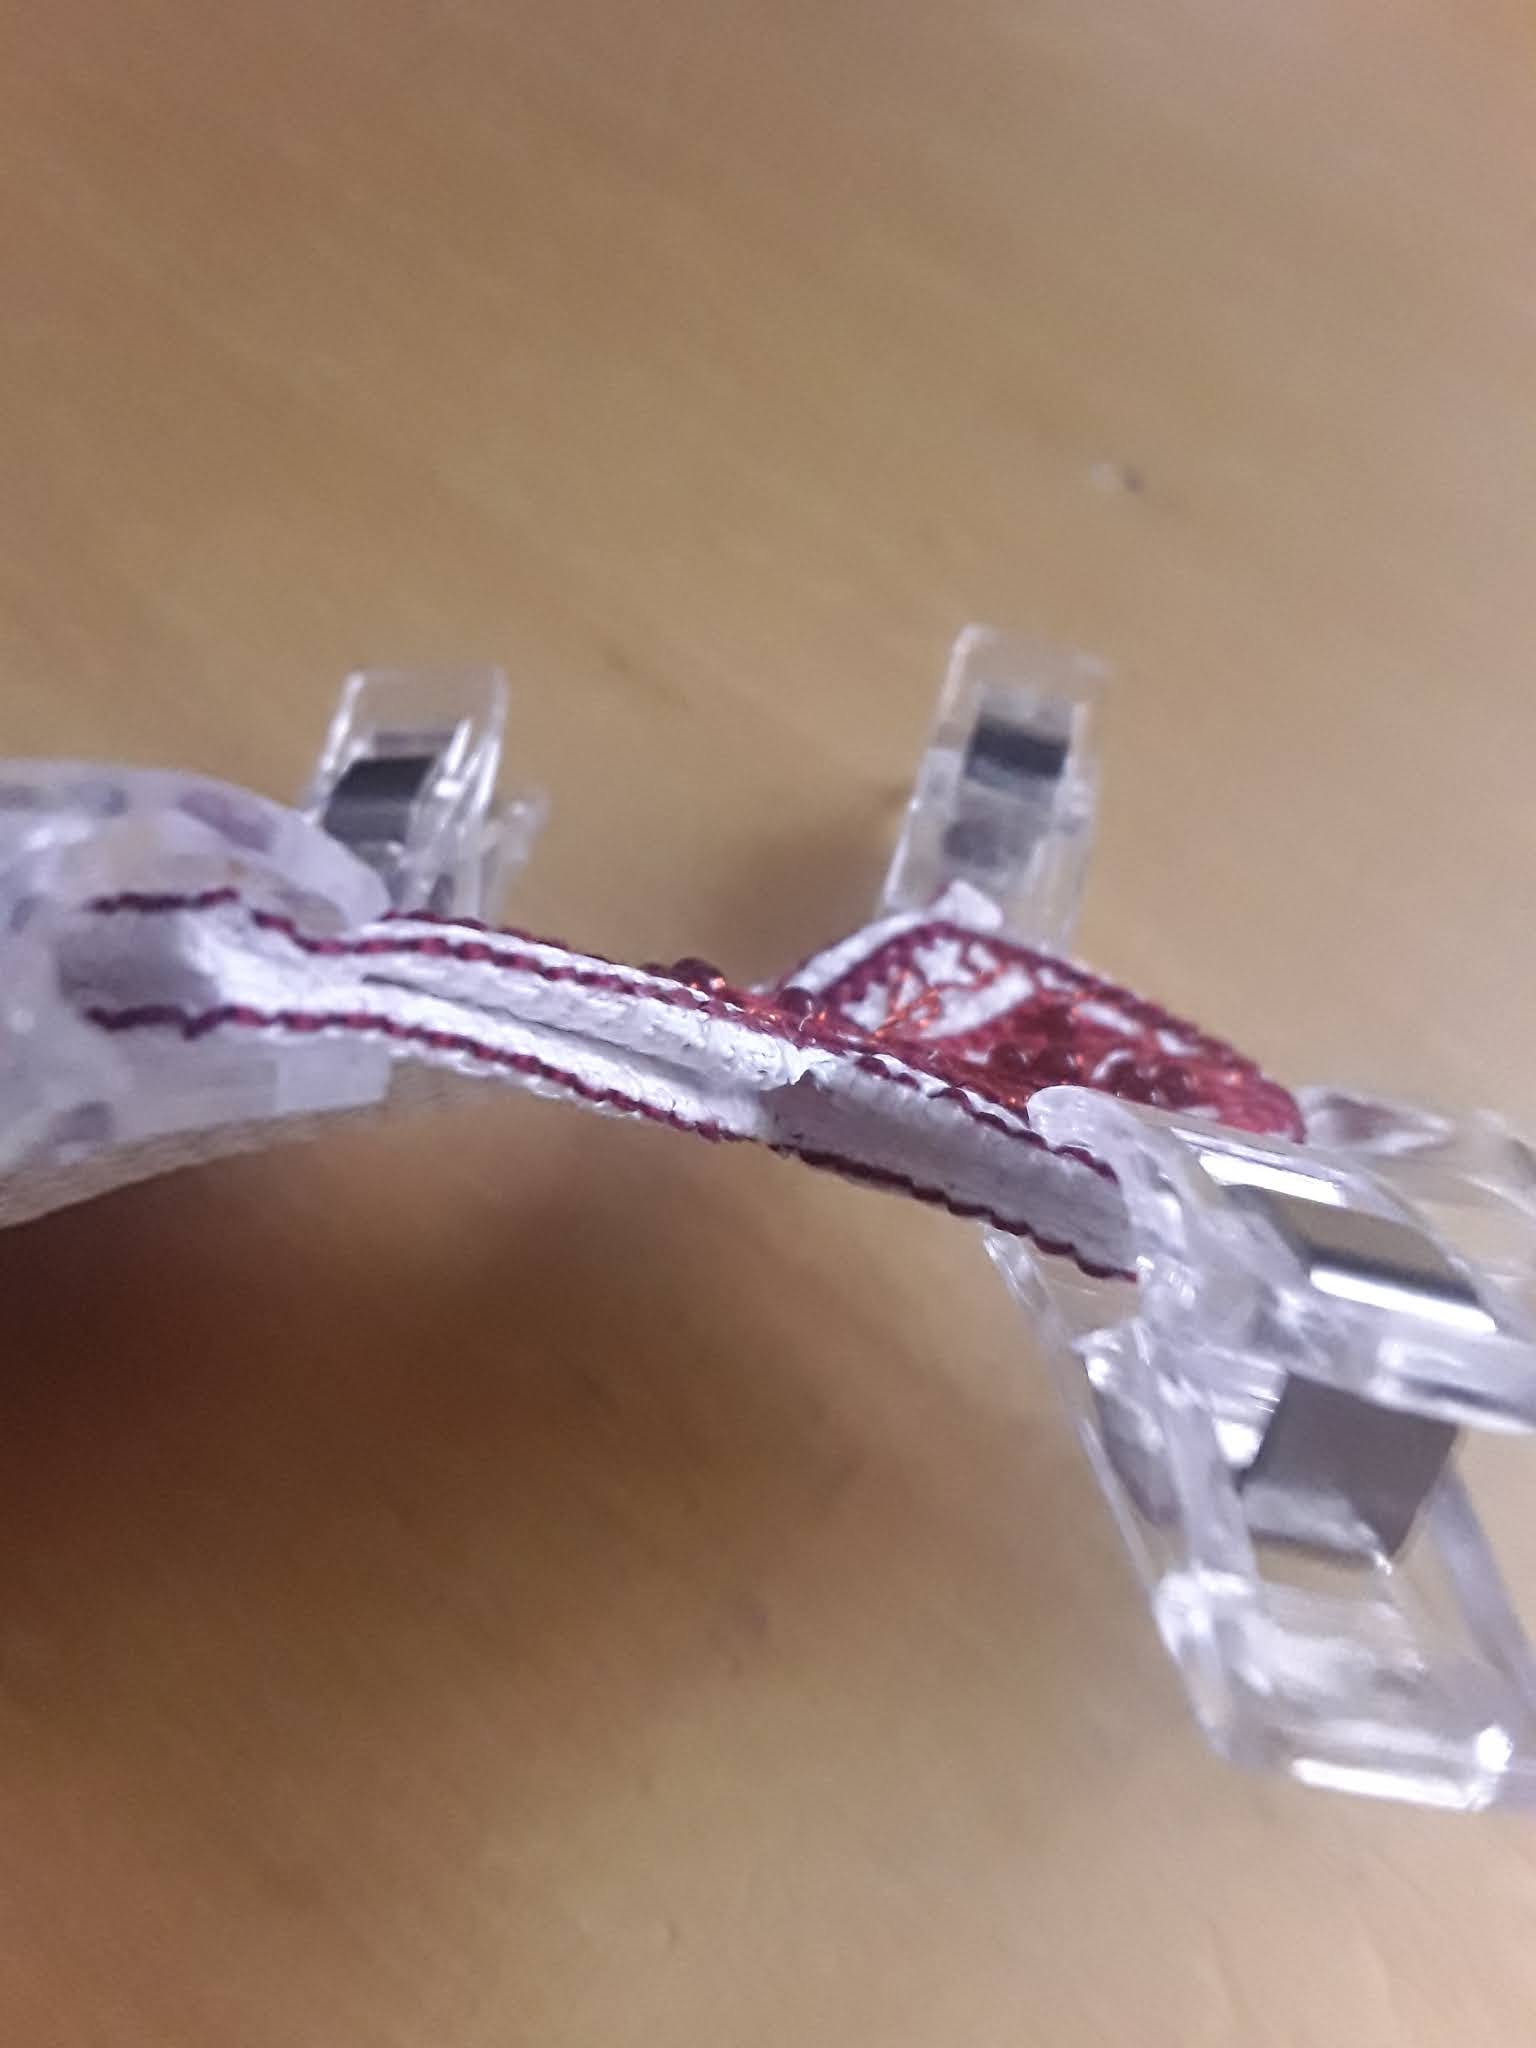
 Fold the seam allowance back and clip/pin/peg into place. Leave the glue to fully dry.
 Place the two parts, right sides out, on top of each other and clip/pin/peg into place.
 Start about halfway along one of the centre side seams (see next photo for a different view) and whip stitch the seams together adding a bead every other stitch if desired. I used TOHO TR-11-250 Silver-Lined Garnet for mine. You will soon see why this is a wise place to start.
 Here you can see the starting point better. You can also see the stopping point for adding the garland cord, or if you are using a loop or making this into an ornament, add the two loop cords each three stitches away from either side of the corner. For the garland cord you need 24" to 60" of floss depending on how you want to make it. For the ornament you need 36" of floss to make the cord. Please look here to see how to make the garland cord.
 Having added your cord end(s) continue round till you have started doing the seam of the larger centre square.
 Remove the clips/pins/pegs and flip the ornament open.
 Grab your stuffing of choice and stuff the part you just finished.
  Fold the top back in place and clip into position again. It looks pretty weird right now.
 Continue stitching, remembering to add the second cord at the end corner (or a tassel for a hanging ornament), until you have almost, but not quite finished stitching all the way round the second small end square. You want to have about four — five stitches left.
 Pull the unstitched part open, possibly pulling a few stitches looser if necessary, and stuff the end bit only.
 Make sure the stuffing is all the way in the section and a bit fluffed like it is in this picture. You want the bit you are about to sew shut to have stuffing under it.
 From the bottom it looks a bit like this.
 Continue sewing the seam shut till you are just past the final corner, and finish stuffing the ornament.
 It will now look something like this.
Notes:
Having finished the garland shape I held it up and realised that I'd forgotten an important part of suspending things: the heavy side will always point downwards, and this happened with my garland.
There are two ways to avoid this: Some experimentation showed that this was needed to make the January ornament hang the right way round.


Notes:
Having finished the garland shape I held it up and realised that I'd forgotten an important part of suspending things: the heavy side will always point downwards, and this happened with my garland.
There are two ways to avoid this:
- Add a weight of some sort at the bottom before filling up the middle section of the ornament.
- Add some sort of decoration at the bottom — during construction is probably easier than at the end.

- I used one 4 mm red glass bicone, one 2 mm red glass bicone and a size 11 seed bead for the left and right side hanging ornamentation.
- I used two 2 mm red glass bicones on either side of a 4 mm red glass bicone with a size 11 seed bead for the central ornamentation.
- The hanging beads are made with thirteen seed beads, then a 2 mm red glass bicone with a seed bead, and then nine seed beads — with the other side reversed.
Because I was adding this after I'd finished the finishing of the garland I had to attach things individually. If you add these in as you reach the corners they should be attached to then just add them in before moving on.
- I used short lengths of threads for the ornamentation which I attached using the loop start method (take thread, fold in half, thread loose ends through needle keeping the loop as the end of the thread. Put the needle through where you want it, go through the loop and then pull it tight).
- Then I thread the beads on.
- Finally, skipping the seed bead I went back through the bicones and tied off the thread.
- Repeat for each bit of the ornamentation.
- I attached the thread with a loop start.
- Then I threaded on thirteen seed beads.
- Then I added a 2 mm bicone and a seed bead.
- I went back through the bicone and pulled things tight, so there was no space between the beads and the ornament or the beads and the bicone.
- Then I added the remaining nine beads.
- I anchored the thread by going through the seam of the ornament
- Then I did the same in reverse as for the first side.
In all cases your mileage may vary so experiment and see what works for you.

I hope this tutorial was helpful!
Wondering if it would be possible to make pdf files for your tutorials...
ReplyDeleteI have lost info from other sites when they closed - not that ot would happen to you!
It is just easier to print it out.
Thanks for all your beautiful charts.
I'm sorry, but I don't make pdfs of my tutorials. When sites close you can often find the pages on the Wayback machine. Just google that, and you will find it, it's part of the internet archive and has been a lifesaver for me in the past. I’m glad you enjoy my patterns! :)
DeleteI really like these garland shapes, especially with your beady little addition!
ReplyDeleteThanks! The beads are almost required to make it hang right.
Delete